
Adding multiple authors to a Jekyll blog was hard. But not anymore. Learn how to add an author box to your Jekyll blog with these easy steps. You can also create a nice author section for your Jekyll blog using this method.
When I wanted an author section for my blog Nallikayi Articles, I thought of differnt ways to make it possible. I had multiple authors. Placing different code for different author was not practical.
I can make a template, add it to every post manually and change author name, image and other details accordingly but it is also not practical if you have too many authors.
I like how WordPress handles different authors. All you need is to add user. But for Jekyll we still don’t have that option. We are doing this the hard way.
- Step 1: Make an author box
- Step 2: Add authors in configuration file
- Step 3: Include author section in post layout
- Step 4: Add author name in all posts
There should be a provision where you just mention authors name in the post and that should be enough for the post to update itself with particular author details. We are doing just that!
This tutorial explains how to add a multiple author box to Jekyll blog posts step by step.
Templating, configuration file and site variables are the saviors here.
Step 1: Make an author box
Create a new html file inside _includes folder, name it author.html and copy paste the below code.
<link rel="stylesheet" href="https://maxcdn.bootstrapcdn.com/font-awesome/4.5.0/css/font-awesome.min.css">

<div class="w3-card-2">
  <div id="author-content">
    <h3>Author</h3>
    <hr>
     <div itemprop="author" id="name-author"><strong>{{ author.display_name }}</strong></div>

     <img itemprop="image" id="image-author" src="{{ author.gravatar }}">
      <div id="about-author">{{ author.about }}</div>
      <div id="social-author">
            <a href="{{ author.facebook }}" ><i class="fa fa-facebook-square fa"></i></a>
            <a href="{{ author.twitter }}" ><i class="fa fa-twitter-square fa"></i></a>
            <a href="{{ author.github }}" ><i class="fa fa-github-square fa"></i></a>
            <a href="{{ author.email }}" ><i class="fa fa-envelope-square fa"></i></a>
      </div>
    </div>
</div>
Design the layout however you want it to be. Make it match to your website layout and color scheme. I’m using font awesme to load icons here. This is a heavy css file. You can omit this if you don’t want any icons in the author section. If you are using font awrsome in your Jekyll blog already then you don’t have to include this again.
Step 2: Add authors in configuration file
Now copy below details into your _config.yml which is in the root of the repository. Change details accordingly. Here I have mentioned only for two authors - sharathdt and sampaths. You can use any number of authors. Add details of new authors to this file in this format.
authors:
      sharathdt:
        display_name: Sharath Kumar
        about: Sharath is a full-time chess coach, part-time web designer and a hobby blogger. He posts his Web Development blogs in <a href="http://blog.webjeda.com" >Webjeda Blog</a></p>
        email: mailto:info@dxartist.com
        web: http://webjeda.com/
        facebook: https://www.facebook.com/sharu725
        twitter: https://twitter.com/sharathdt
        github: https://github.com/sharu725/
        gravatar: https://s.gravatar.com/avatar/73c67b9ce8685bfb9e906a5865c0aef8?s=80


        sampaths:
        display_name: Sampath Sirimane
        about: Sampath is a blogger, story and novel writer for a damous daily news paper.
        email: mailto: sirimane@gmail.com
        web: http://samapathsirimane.com
        facebook: https://www.facebook.com/sirimane.sampath
        twitter: https://twitter.com/sirimane
        github: https://github.com/sirimane/
        gravatar: https://raw.githubusercontent.com/sharu725/lanyon/gh-pages/public/img/samapths.jpg
Step 3: Include author section in post layout
Now in your post template file, which is inside _layout folder add these lines at the end of the post layout as shown in the example below.
Sample post layout
---
layout: default
---

<article id="post-page" >
        <h2>{{ page.title }}</h2>
        <time datetime="{{ page.date | date_to_xmlschema }}" class="by-line" >{{ page.date | date_to_string }}</time>
        <div class="content" >

        {{ content }}

        </div>

        {% assign author = site.authors[page.author] %}
        {% include  author.html %}


</article>
Step 4: Add author name in all posts
Now in all your posts which are inside _post folder, you should add a new attribute called author and respective author name that you have used for details in _config.yml file.
---
title: Some Title
author: sharathdt
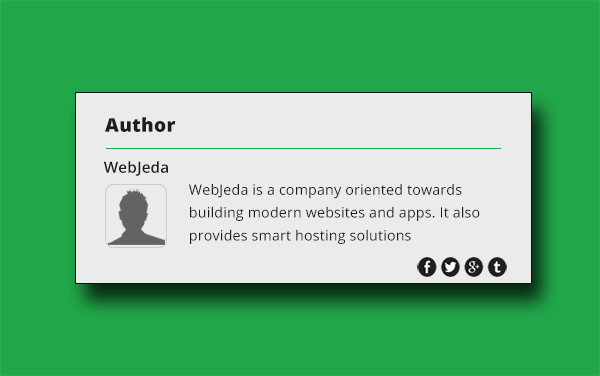
---Now your post recognizes the author as sharathdt and all the details like author name, author image, author about are updated accordingly. Here is how it looks like in my blog posts

Your author box may not be styled as mine but you can style it however you want it to be. I have used w3-css cards for card style.
Here is how I have styled it
<link rel="stylesheet" href="http://www.w3schools.com/lib/w3.css">

div#author-content {
    width:90%;
    margin:0 auto;
    padding-bottom: 35px;
}

img#image-author {
    margin-left: 0px;
    margin-top: 10px;
    float: left;
}

#social-author {
    float:right;

}

#im-ab {
    padding-bottom: 2px;
}
So that is about adding multiple author section for Jekyll blog. Let me know if you were able to successfully implement this in your Jekyll blog or website.
Also, post the link to your blog in the comment section once you successfully implement this.
Thanks for reading!