

What is RSS feed and why is it used?
Initially, when I heard about RSS, I had no freaking clue what it was. I just knew that it doesn’t have its own logo but using a tilted WiFi logo :) . RSS stands for Rich Site Summary. It is in .xml format. It is used for delivering regularly changing content of a website like posts.
- What is RSS feed and why is it used?
- What is Feedburner?
- How to get Feedburner subscribe option for my Jekyll blog?
It should have been called Poor Site Summary because it lacks a lot of things that your site actually has. In other words, it is the stripped down version of your website.
RSS is a simple xml file enclosed with <rss> tag. There is a reason why it is simple. A user usually subscribes to your blog to read the content through an RSS-reader app. We define only things that matter in the feed file. By saying things that matter, what I mean is - in an article - title, description, cover image etc.,
It should not include any style, share buttons etc. because that doesn’t matter. Also, you may change the layout very often which should not disturb your readers.
What is Feedburner?
Feedburner is a feed management webapp. Currently owned by Google but not supported by Google anymore. If you set-up your website feed in Feedburner, it will modify the feed according to your requirement. It also provides traffic stats and other useful statistics.
The majority of blogging community is using Feedburner for its subscribe option; where if a reader subscribes, then an email is sent to his inbox every time you publish a new article.
Sample Feedburner Form: Subscribe
How to get Feedburner subscribe option for my Jekyll blog?
Feedburner setup is only done once. It takes care of subscriptions on its own without your intervention. This is the main reason I recommend Feedburner for beginners.
In the eyes of Feedburner, Jekyll blogs are no different compared to WordPress or Blogger blogs. The reason is that Feedburner is only concerned about the feed file but not the whole of your website. It doesn’t care how you created the blog. There are many plugins for WordPress and Blogger for easy integration of Feedburner but for Jekyll we are doing things on our own.
Let’s dive right in.
Step 1: Keep Jekyll RSS file ready
As I have explained RSS is a simple xml file. Usually, a default Jekyll site will have feed file with the name atom.xml in the root directory. If you do not have one then here is a code that you can use. Create a new file with the name feed.xml in the root of your repository and copy this code in it,
---
layout: null
---

<?xml version="1.0" encoding="utf-8"?>
<feed xmlns="http://www.w3.org/2005/Atom">

     <title>{{ site.title }}</title>
     <link href="{{ site.url }}/atom.xml" rel="self"/>
     <id>{{ site.url }}</id>
     <updated>{{ site.time | date_to_xmlschema }}</updated>

     <author>
       <name>{{ site.author.name }}</name>
       <uri>{{ site.author.url }}</uri>
       <email>{{ site.author.email }}</email>
     </author>

 {% for post in site.posts limit: 10 %}
 <entry>
   <title>{{ post.title }}</title>
   <link href="{{ site.url }}{{ post.url }}"/>
   <id>{{ site.url }}{{ post.id }}</id>
   <updated>{{ post.date | date_to_xmlschema }}</updated>
   <content type="html">{{ post.content | xml_escape | truncatewords:50 }}</content>
 </entry>
 {% endfor %}

</feed>
Now this file can be accessed using the URL yourdomain.com/feed.xml. This is your feed URL and we will be using this for Feedburner. Edit the file as per your requirements because it may be missing some tags for example if you are a podcaster or a vlogger(video blogger), then you may have to enclose audio or video file in it.
Add more tags if you think they are necessary. Use this guide to know what tags are for what purpose.
Once you are done adding tags, validate your RSS using RSS validator. Troubleshoot errors if any.
Step2: Burn your feed using Feedburner!
Goto Feedburner and sign up using a gmail account.
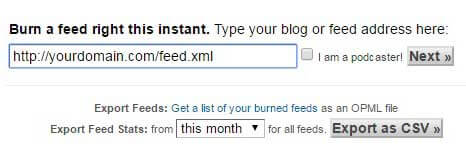 Once you log-in, you should see an input bar where you can type your feed URL. Check I’m a podcaster! only if your feed has podcast audio files enclosed in it.

Click on next and select a proper Title and URL for your feed and click next. You may see some more options to choose. Check them if you are interested. Otherwise, skip directly to feed management.
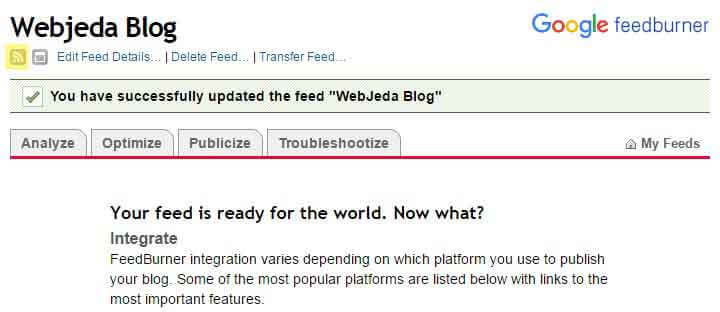
After a successful setup, you should see this success message. Check your feed by clicking on the highlighted button. The button next to it is for your website.
This feed will be provided for the subscribers in an email every time you publish a new article. To find the subscribe link, go to publicize.
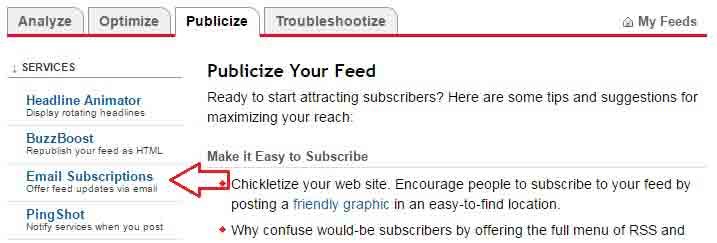
In publicize tab you should see an option called Email Subscription. Click on it and click activate. There are two kinds of subscribe options available. One is an embed link where it shows a button to subscribe and the other is just a link.
We can use our own custom icon like I did for this blog. If you are browsing this website through a desktop then you see a subscribe icon on the bottom-right corner which never goes away.
Find Subscription Link Code and copy the code and hit save.
<a href="https://feedburner.google.com/fb/a/mailverify?uri=webjedablog&loc=en_US">Subscribe to Webjeda Blog by Email</a>If you put this in your website, it will look like this: Subscribe to Webjeda Blog by Email which opens in a new tab. But, we want this to open in a pop-up and also we want an icon in place of the text. I’m using RSS icon from Font Awesome. Put this code in your website.
<link rel="stylesheet" href="https://maxcdn.bootstrapcdn.com/font-awesome/4.5.0/css/font-awesome.min.css">
<a href="https://feedburner.google.com/fb/a/mailverify?uri=webjedablog&loc=en_US" onclick="window.open(this.href, 'mywin',
'left=20,top=20,width=500,height=500,toolbar=1,resizable=0'); return false;" >
<i class="fa-rss fa"></i>
</a>This is how it looks like:
I’m using font-awesome CSS here. If you have called this link in the head tag already then there is no need to include it again. Also instead of <i> tag, you can use <img> and provide the icon source. The code has a onclick attribute which makes sure the link opens up as a pop-up.
Success!
That is all there is. A user has to click on the link and provide his email, verify captcha and hit complete subscription request.
If the images are not showing up on your feedburner feed, then you may be using relative URL for your images. Use complete URL http://blog.webjeda/images/some-image.jpg of the image instead of a relative URL /images/some-image.jpg. In Jekyll this can be achieved by using site.url or site.baseurl variable.
There are plenty of options to customize your feed. The first thing I customize is the confirmation email. Whenever a user subscribes to your blog using Feedburner, he will receive an email asking to click on confirmation.
It is important to convince them to click on it. In order to do that, edit the email in a compelling fashion so that user knows you have something to offer.
And also do not forget to include your logo in the email. Many a times user may not check his/her email for a while and your email may look un-related if he/she checks it at a later time. The human brain can recall images easier than text. So do not forget to configure the confirmation email so that it includes a logo.
I hope that helped to setup Feedburner for your blog. Now that you know how it works, subscribe to my blog. I publish new articles every other week.
Thanks for reading!