
Why use a subscribe form?
Subscribe form is used basically to collect visitors’ emails to provide them an update every time you post a new article. Also, a good way to get some initial traffic to a new post.
- Why use a subscribe form?
- How to create a subscribe form on Jekyll blog?
- Update 1 - MailChimp subscribe form on Jekyll
Many bloggers use mailing list for affiliate marketing. I don’t think it is a bad idea. If a user is interested in the stuff blogger is selling, then it is a win-win.
WordPress has an advantage over Jekyll since it has many plugins that can do the job without breaking a sweat. But, after moving all my blogs from WordPress to Jekyll and static hosting, I had to find an alternative for subscribe forms.
If you are using a hosting where php is supported then the normal forms will work just fine. But if you’re using a static hosting like Github Pages then you might want to use other ways to collect emails.
This is one of those things I always wanted in Jekyll but did not know how to do it. This idea hit me one day while I was working on contact forms. Initially, I tried to create a form with FormSpree similar to how I created a contact form.
It was a painful experience. FormSpree requires verification. This verification is URL specific. If the form is on all the pages of the website then I have to verify an email for every single page! FormSpree is good if you are using it for a contact form on one specific page but not for all pages. What I eventually found was that SimpleForm can be used to make a contact form which works on all pages! Which means it can be used as a subscribe form.
There are two types of subscribe forms described here. One is just an email collector and another one is a fully automatic mailchimp subscribe form for Jekyll. If you are looking for mailchimp form then skip to jekyll mailchimp form.
What I’m showing here is an email collector. So it just collects users’ emails. I think that is what a basic subscriber form does. You can also setup an auto-reply option. Auto-reply can help if you are offering an e-book for a subscription. I haven’t tried it yet but it should work.
But before collecting emails you should have an email id. You can use any email id but it is a good idea if you use a domain email.
If you want to use MailChimp form on jekyll (I’m currently using it) then skip to MailChimp on Jekyll section. MailChimp takes care of everything. You can create lists, design forms, send campaign emails etc., Overall a very good platform for beginners.
How to create a subscribe form on Jekyll blog?
We are using a free service called SimpleForm to create our form. SimpleForm is a service similar to Formspree which I discussed in How to make a contact form in Jekyll
I’m not using FormSpree because it doesn’t work on all pages. Formspree is URL specific. If you want your subscribe form to be on all the pages(which is usually the case), SimpleForm has to be the logical choice.
Step 1: Get an API Token from SimpleForm
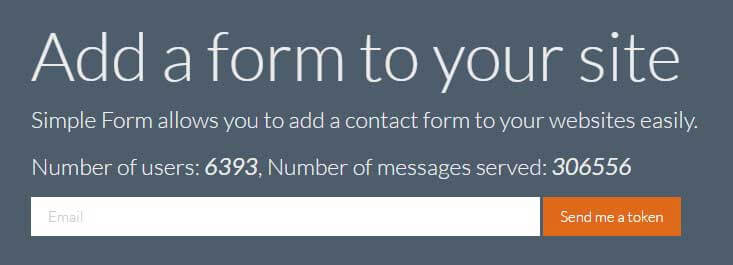
Enter the email address you want to use in the input field and click on Send me a token
You should receive an email with the token similar to this one
Your form api token is c7b404f97b2e45f982ffed4995bf42afStep 2: Create a form
Now create a form in Jekyll with only email input in it and change the action according to SimpleForm documentations. You can create it on a separate page so that users will go to that page and subscribe or you can create it in the default layout so that the form is available on all pages.
<form action="https://getsimpleform.com/messages?form_api_token=c7b404f97b2e45f982ffed4995bf42af" method="post">
    <li class="contact-li">
        <input type="email" placeholder="Your email" id="email"/>
        <input type="submit" value="Subscribe" id="submit"/>
    </li>
</form>
Step 3: Create a success page
Once the user enters his email in the form and hits subscribe, he should be shown a message that he has successfully subscribed to the updates. Create a thank you page in Jekyll and redirect users to that page after successful submission.
Form with redirection
<form action="https://getsimpleform.com/messages?form_api_token=c7b404f97b2e45f982ffed4995bf42af" method="post">
  <!-- the redirect_to is optional, the form will redirect to the referrer on submission -->
    <li class="contact-li">
        <input type="email" placeholder="Your email" id="email"/>
        <input type="submit" value="Subscribe" id="submit"/>
    </li>

   <!-- the redirect_to is optional, the form will redirect to the referrer on submission -->
    <input type="hidden" name='redirect_to' value="/path/to/thank-you.html"/>

</form>
Typical thank you page
<!DOCTYPE html>
<html lang="en">
    <head>
        <meta charset="UTF-8">
        <title>Thank you</title>
    </head>
    <body>
        <h1>Thank you. Your entry has reached us!</h1>
    </body>
</html>
Step 4: Success!
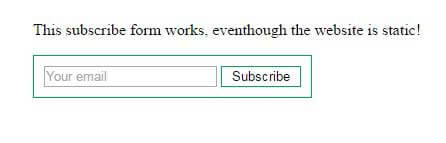
That’s it. Now collect emails and make a list. I use MailChimp and I send an update to the list using campaign every time I make a new post.
Here is a working example: Sample Subscribe Form
I hope that helped. I was using feed-burner for subscriptions. I have a post on How to use Feedburner for subscriptions. Feedburner is a free and pretty good tool for managing feeds and subscriptions.
Update 1 - MailChimp subscribe form on Jekyll

A user asked how he can handle un-subscriptions, which is a valid question because users may want to opt out of your mailing list. Thanks to him for bringing up this topic.
As I have mentioned in the article this is a completely manual subscription handling. But what if someone wants an automated list generation. Which means after every subscription, email will be collected as a list and if someone wants to un-subscribe, the list will update itself.
Many times, emails that you send to your subscribers should have an unsubscribe link. Otherwise, email providers may mark it as spam and move it to spam folder every time. No one checks spam folder unless they are asked to do so. And also it is not practical to create a un-subscribe link and include it every time you send an email, you can opt some third party email subscription handlers.
I prefer these two email subscription handlers - Aweber or MailChimp. I suggest MailChimp for beginners. Create an account in MailChimp for free.
MailChimp has an option to create a list(which will be automatically updated upon new subscriptions and un-subscriptions), an option to create a form for normal websites and an embeddable form for static websites.
-
Sign up with Mailchimp
-
Create a list
-
Click on Signup Forms inside the list
-
Select Embedded forms
For Jekyll websites, one must choose embeddable forms. Here is how the code looks like. You can customize the form design in any way you like.
<!-- Begin MailChimp Signup Form -->
<link href="//cdn-images.mailchimp.com/embedcode/classic-10_7.css" rel="stylesheet" type="text/css">
<style type="text/css">
#mc_embed_signup{background:#fff; clear:left; font:14px Helvetica,Arial,sans-serif; }
/* Add your own MailChimp form style overrides in your site stylesheet or in this style block.
We recommend moving this block and the preceding CSS link to the HEAD of your HTML file. */
</style>
<div id="mc_embed_signup">
<form action="//redgadgets.us10.list-manage.com/subscribe/post?u=210acce5db69d3d4a04b0e25d&id=a268d63442" method="post" id="mc-embedded-subscribe-form" name="mc-embedded-subscribe-form" class="validate" target="_blank" novalidate>
<div id="mc_embed_signup_scroll">
<h2>Subscribe to our mailing list</h2>
<div class="indicates-required"><span class="asterisk">*</span> indicates required</div>
<div class="mc-field-group">
<label for="mce-EMAIL">Email Address <span class="asterisk">*</span>
</label>
<input type="email" value="" name="EMAIL" class="required email" id="mce-EMAIL">
</div>
<div id="mce-responses" class="clear">
<div class="response" id="mce-error-response" style="display:none"></div>
<div class="response" id="mce-success-response" style="display:none"></div>
</div> <!-- real people should not fill this in and expect good things - do not remove this or risk form bot signups-->
<div style="position: absolute; left: -5000px;" aria-hidden="true"><input type="text" name="b_210acce5db69d3d4a04b0e25d_a268d63442" tabindex="-1" value=""></div>
<div class="clear"><input type="submit" value="Subscribe" name="subscribe" id="mc-embedded-subscribe" class="button"></div>
</div>
</form>
</div>
<script type='text/javascript' src='//s3.amazonaws.com/downloads.mailchimp.com/js/mc-validate.js'></script><script type='text/javascript'>(function($) {window.fnames = new Array(); window.ftypes = new Array();fnames[0]='EMAIL';ftypes[0]='email';fnames[1]='FNAME';ftypes[1]='text';fnames[2]='LNAME';ftypes[2]='text';}(jQuery));var $mcj = jQuery.noConflict(true);</script>
<!--End mc_embed_signup-->I have embedded a working form here.
Once you enter the details, hit subscribe button; You should receive an email right then. Actually this is the form I’m using in my website. You will get the same form when you click on Subscribe button on the menu bar. The form may look different but it does the same job as this form.
Watch a video tutorial instead
I hope that similar kind of form can be embedded to a jekyll site using Aweber as well. I haven’t used Aweber but if anyone has used it then feel free to give your inputs.
I hope that covers types subscription forms available for Jekyll. Let me know which one you have implemented and for what reason. If you couldn’t get this working then let me know in the comment section.
Thanks for reading!